3. Sculpting head - Uvs
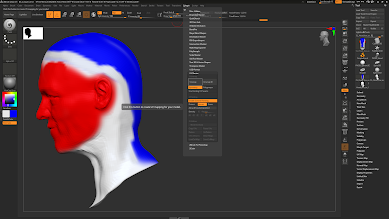
When i tried to create the uvs for the sculpt i encountered this issue in which multiple faces were colored differently. This is a problem that also affects the import in maya as it will create each colour as an object. Thanks to my tutor, to fix this all i had to do was to select mrgb then going on colour and fillup the mesh with one single colour.
To create the uvs. Working on the low subed mesh, i went on Zpluging, Uv master then enable colour painting and worked on a clone. Then by using protect as red and attack as blue, i painted the parts that i wanted to not break when unwrapping the head.
After this i unwrapped and flattened the mesh to see the result, i continued to do this until i obtained a better result that i could work with later on, making sure that the seam is not on the face or ears and instead, in areas that could be hidden by hair or clothes.
To finish i created a displacement map from the high detail version, that i will later use in maya and substance painter.


Comments
Post a Comment